You may be wondering why you need to know how to use analog multimeter in a wildly digital age. Well, the reasons are plenty.
As a modern electrician, you never know when and where the need arises for you to read an analog display – whether it is on a multimeter or another measuring tool.
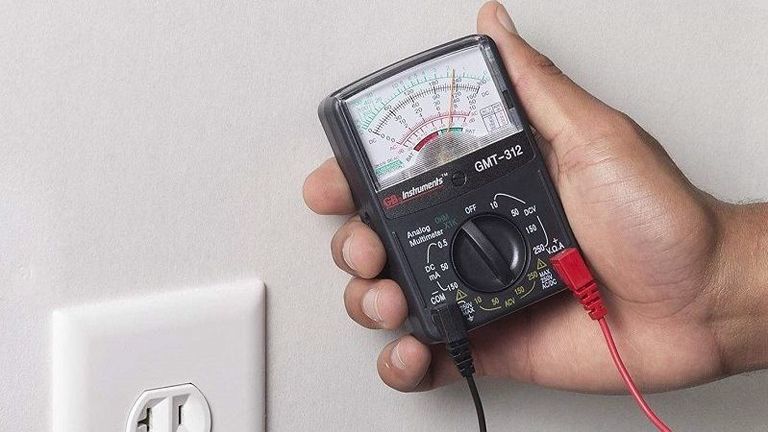
Plus, there are applications that still use analog meters (also written /as analogue meters) for troubleshooting, owing to their accuracy and true RMS value conversion.
So, today, we are going to show you how to measure electrical quantities using an analog multimeter to measure different electrical quantities. But before that let’s quickly go through the core differences between an analog multimeter and a digital multimeter (DMM).
Differences Between an Analog Multimeter and a DMM
The following are the qualities that differentiate an analog meter from a DMM:
- Analog display (with multiple scales for different quantities)
- Frequent manual calibration is required
- Faster response rate (analog meters do not need to convert the measured value into figures like in DMM)
- Closest to true RMS value
- Higher accuracy but prone to human errors while noting down measurements
Then there is the case of legacy and "true electricians know how to use analog multimeters" ideology. Whatever may be your reasons, knowing your way around an analog meter always pays off.
And if you are a student studying electricity, use this guide to know what and how the previous generation used to measure electrical quantities.
Understanding the Analog Multimeter Scale
Before we can jump into the steps, it is important that the workings of the scale of an analog meter are fully clear to us.
This is important because we have been so acclimatized with our digital tools that it can become slightly confusing to read the analog scale. Take a look at the image shown below.

Understanding the Panel
In the image, at the bottom left is where your test leads will be connected. It is similar to how you connect the leads in a DMM. The ports in the bottom right are for advanced options.
The optional polarity switch comes in handy when you want to reverse the polarity of your measurement. The switch in the middle is how you select the quantity to be measured and the desired range.
For example, if you want to use an analog multimeter to measure voltage (AC), you would switch it to the left-hand side of the dial.
Some multimeters have different switches for range and quantity selection. Some also have a separate dial for zeroing out the meter, which we will cover later in this guide.
The Analog Scale
Take a look at the close-up image of an analog scale below.

The top line (in black) is the ohmic scale where you measure the resistance from left to right. Based on the range selected, you will have to multiply the scale reading with the range currently selected. For example, if the pointer is steady at 5 and your range is 1k then your reading is 5k ohms.
The range selection is done in similar fashion for all quantity measurements.
Below the ohmic scale are the voltage and current scales. The black line adjacent to the ohmic scale is where you measure DC voltage and current. The red line is always for AC measurements. Please note that current and voltage measurements are read from right to left.
The chief difference between an analog multimeter and voltmeter/ammeter is the scale. A voltmeter will only have two scales for AC and DC voltage measurement, whereas an ammeter or a galvanometer will only have one scale for AC and DC amps measurement.
Now let’s have a look at measuring some quantities.
How to Use an Analog Multimeter

If you have an analog meter of your own, please follow the steps outlined below –
- Connect the test leads to your analog multimeter
- Use the following setups for measuring different quantities:
- Use an AA battery to measure voltage DC voltage and current
- Use an AC socket to measure AV voltage and current
- Use a resistor to measure resistance
- Use a wire to measure continuity
- For each setup, connect the test probes to the element to be measured and check the reading in the scale. In this guide, we will take the example of measuring DC voltage
- Connect the probes to either end of the AA battery (approx. 9V). The pointer should move across the scale depending upon the range you have selected. Using the above image, if the battery is fully charged, the pointer should point between 8 and 10 on the scale. If not done, please select the DC volt range in your multimeter that is higher than 10 V (usually 10V or 12V)
- Try the same technique for other setups to measure the respective quantities.
As noted earlier, the key to accurate analog measurement is range selection and multiplication. Everything else is similar to what and how you do use your DMM.
In the above example involving the battery, if you use your analog multimeter to measure the voltage of a car battery, then the range has to be higher. You will also have to do simple multiplication to get the final measurement.
For example, if your DC volt range is 250V, and the pointer is between 50 and 100, then the voltage is around 75 volts depending upon the exact point.
Why You Should Always Calibrate Your Analog Multimeter?
Analog multimeters work on batteries, and as their charge drains gradually, the multimeter’s ability to provide accurate readings also diminishes.
Therefore, we recommend zeroing out your multimeter before every major measurement activity. Following are the steps:
- Select the resistance range on your dial
- Connect the test probes to the meter and then connect them together (the positive and negative leads should touch each other) to establish zero resistance
- Ideally, your meter should read zero resistance
- If it does not, use the ‘zero out’ dial (provided in most meters either in the front panel or back) and take the pointer to zeroth value on the scale
- This should calibrate your meter.
Useful Tips and Tricks
- While measuring with an analog multimeter, you should always select the appropriate range for accurate readings. This should be done before as well as while measuring the quantity
- Always calibrate your analog multimeter before a major measurement or troubleshooting task. If you are a daily user, weekly calibration is recommended
- Replace the batteries if you notice major fluctuations in measurements
- Always use the highest range id you do not know the approximate value of the quantity being measured.
Conclusion
There you have the basic guide on how to use an analog multimeter to measure voltage, current, and resistance. The basic principle is same as DMM but here you just need to put in more efforts. We hope that this guide has been helpful.

